How to create a slider with custom post type in WordPress
When creating websites, we often need solutions that go beyond the basic functions of WordPress. Such a solution is a slider, which often has to take certain properties or styles. In this tutorial I will show how to create your own slider, which will display Custom Post.
The Slider will be created in two ways:
- The first way is to create a slider that will display your own type of posts using the owlCarousel plugin. The slider’s task will be to display posts in a responsive slider supporting drag&drop.
system.
- The second slider will be a full-width slider, which will have a simple JS script with its own navigation. The slider will store its slides in custom post type and will contain the image and title of the image.
Moreover, for each slider type, we will show the implementation for two page builders – WPBakery and Elementor. The sliders will be implemented on the basis of adding new widgets to previously created plug-ins: REDO JSComposer Additional and REDO Elementor Additional.
Our own WordPress slider – how to create?
What you must know
- First of all you need to know the builder’s page WPBakery on which we base our website construction. In our previous guides you will find all the knowledge you need to understand the process of creating widgets for WPBakery.
Link to the article: REDO JSComposer Additional – plugin adding widget to WPBakery.
Link to WPBakery plugin: https://wpbakery.com/ - If you don’t know WPBaker you will need to know another builder’s page – Elementor. This is one of the best known plugins for creating websites in WordPress system. To understand how our plugin for creating widgets for Elementor works – read the article: Elementor – how to create your own custom post plugin.
Link to Elementor plugin: https://elementor.com/ - You will need to read basic documentation of OwlCarousel plugin, which will allow the slider to work properly.
Link to the plugin: https://owlcarousel2.github.io/OwlCarousel2/ - We rely on the basic programming skills of PHP, and the ability to create code HTML and CSS. If you have read our previous guides, creating a slider shouldn’t be difficult.
Link to the list of previous articles: Articles.
We create a responsive drag&drop slider with OwlCarousel
The first way will be to create a slider that allows you to display our custom posts using the OwlCarousel plugin. We will implement two widgets – one for WPBakery builder’s page, the other for Elementor.
We will start by creating our own type of post.
We will create a custom post type Opinion
In our case, it will be a custom post type ‘opinion’, which will include:
- Title – Name of the speaker,
- Distinguishing picture – Referral thumbnail,
- Excerpt – Title in the company of the speaker,
- Content – Content of opinion.
If you do not know how to create your own custom post type, please refer to the article:
Create a view (template) for a custom post in WordPress
We create a widget for WPBakery plugin.
Once we have created the custom post type that we want to display, we move on to creating a widget. Create a slider.php file in the render folder and include it in the main.php file. Inside the file slider.php we add basic configuration of the widget. If you don’t know how to do it read the article: Creating your own plugin that adds a widget to the WPBakery plugin.
1 2 3 4 5 6 7 8 9 10 11 12 13 14 15 16 17 18 19 20 21 22 23 24 25 26 27 28 29 30 31 32 33 34 35 36 37 38 39 40 41 42 43 44 45 46 47 48 49 50 51 52 53 54 55 56 57 58 59 60 61 62 | <?php if ( ! defined( 'ABSPATH' ) ) { die( '-1' ); } class WPBakeryShortCode_slider extends WPBakeryShortCode { protected function content( $atts, $content = null ) { extract( shortcode_atts( array( '' => '' ), $atts ) ); $some_id = rand(5, 500); $opinie = get_posts(array( "post_type" => 'opinia', 'numberposts' => -1, 'order' => 'ASC' )); ob_start(); ?> <!-- HTML DESIGN HERE --> <div class="opinia-container"> <h2 class="opinia-container-tytul">Opinie</h2> <?php foreach($opinie as $op) : ?> <div class="item"> <div class="opinia-header"> <div class="opinia-image-container"> <img src="<?php echo get_the_post_thumbnail_url($op->ID) ?>"/> </div> <div class="opinia-nazwa-container"> <h4><?php echo get_the_title($op->ID); ?></h4> <p><?php echo get_the_excerpt($op->ID); ?></p> </div> </div> <div class="opinia-content-container"> <?php echo $op->post_content; ?> </div> </div> <?php endforeach ?> </div> <!-- HTML END DESIGN HERE --> <?php return ob_get_clean(); } } vc_map( array( "name" => __( 'Slider', 'redo_slider' ), "base" => "slider", "category" => __('REDO Addons'), "description" => __('Display references slider', ''), "icon" => plugin_dir_url( __FILE__ ).'../icons/int-banner.png', 'params' => array( ), ) ); |
In this way we get a working widget displaying all ‘opinion’ posts. We have added two test opinions and displayed them using our widget.


The REDO Additional plug-ins for WPBakery and Elementor can be downloaded here – REDO Additional (3596 downloads )
Create a widget for the Elementor plugin
If we are using Elementor, we need to create a widget using our REDO plugin Elementor Additional – if you don’t know how our plugin works I refer to the article: Elementor – how to create your own custom post plugin.
We create slider.php file in render folder and attach it in main.php file. Inside slider.php file we add basic widget configuration.
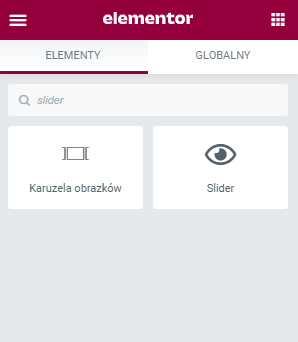
1 2 3 4 5 6 7 8 9 10 11 12 13 14 15 16 17 18 19 20 21 22 23 24 25 26 27 28 29 30 31 32 33 34 35 36 37 38 39 40 41 42 43 44 45 46 47 48 49 50 51 52 53 54 55 56 57 58 59 60 61 62 63 64 65 66 67 68 69 70 71 72 73 74 75 76 77 78 79 80 81 | <?php namespace REDO\Widgets; use Elementor\Widget_Base; use Elementor\Controls_Manager; if ( ! defined( 'ABSPATH' ) ) exit; class Slider extends Widget_Base { public function get_name() { return 'slider'; } public function get_title() { return __( 'Slider' ); } public function get_icon() { return 'fa fa-eye'; } public function get_categories(){ return ['general']; } protected function _register_controls() { $this->start_controls_section( 'section_content', [ 'label' => 'Settings', ] ); $this->add_control( 'slider', [ 'label' => 'Slider', 'type' => \Elementor\Controls_Manager::HEADING, 'default' => 'Display references' ] ); $this->end_controls_section(); } protected function render(){ $args = array( 'post_type' => 'opinia', 'posts_per_page' => -1, 'orderby' => 'date' ); $query = new \WP_Query($args); $opinie = ($query->posts); ?> <!-- HTML DESIGN HERE --> <div class="opinia-container"> <h2 class="opinia-container-tytul">Opinie</h2> <?php foreach($opinie as $op) : ?> <div class="item"> <div class="opinia-header"> <div class="opinia-image-container"> <img src="<?php echo get_the_post_thumbnail_url($op->ID) ?>"/> </div> <div class="opinia-nazwa-container"> <h4><?php echo get_the_title($op->ID); ?></h4> <p><?php echo get_the_excerpt($op->ID); ?></p> </div> </div> <div class="opinia-content-container"> <?php echo $op->post_content; ?> </div> </div> <?php endforeach ?> </div> <!-- HTML END DESIGN HERE --> <?php } } |
We receive a properly functioning Elementor – Slider widget.
The REDO Additional plug-ins for WPBakery and Elementor can be downloaded here – REDO Additional (3596 downloads )
We create a slider with an owlCarousel
We attach the plugin to the project
The part about creating a widget is already well known to us from previous articles and has not caused us any problem. Now we will move on to owlCarousel plugin application. There are two ways to use the plugin – you can do it. First way is to attach plugin files from external CDN source or physically place files on the server. In this case we will use the option to attach files via CDN links.
The links should be properly attached to the main CSS file and the main JS file.
CSS:
- <link href=”https://cdnjs.cloudflare.com/ajax/libs/OwlCarousel2/2.3.4/assets/owl.carousel.min.css” rel=”stylesheet”>
- <link href=”https://cdnjs.cloudflare.com/ajax/libs/OwlCarousel2/2.3.4/assets/owl.theme.default.min.css” rel=”stylesheet”>
JS:
- <script src=”https://cdnjs.cloudflare.com/ajax/libs/OwlCarousel2/2.3.4/owl.carousel.min.js”></script>
Basic slider configuration
Now we have to go back to the code of our slider.php widget and we have to close our opinions in one container that will work as owlCarousel. To do this you need to add foreach before the loop div, which we will call . owl-carousel and we will add .owl-theme to use the basic properties of the owlCarousel plugin.
Our code will look like this:
1 2 3 4 5 6 7 8 9 10 11 12 13 14 15 16 17 18 19 20 21 22 23 24 | <!-- HTML DESIGN HERE --> <div class="opinia-container"> <h2 class="opinia-container-tytul">Opinie</h2> <div class="owl-carousel owl-theme"> <?php foreach($opinie as $op) : ?> <div class="item"> <div class="opinia-header"> <div class="opinia-image-container"> <img src="<?php echo get_the_post_thumbnail_url($op->ID) ?>"/> </div> <div class="opinia-nazwa-container"> <h4><?php echo get_the_title($op->ID); ?></h4> <p><?php echo get_the_excerpt($op->ID); ?></p> </div> </div> <div class="opinia-content-container"> <?php echo $op->post_content; ?> </div> </div> <?php endforeach ?> </div> </div> <!-- HTML END DESIGN HERE --> |
Now we move on to the initiation of owlCarousel(). In main js file, we add basic plugin configuration:
1 2 3 4 5 6 | $('.owl-carousel').owlCarousel({ loop:true, margin:10, nav:true, items: 1 }) |
Radio! We created the slider with owlCarousel.
Our javascript code correctly initiated the owlCarousel() for a previously created div’a .owl-carousel. It has basic slider properties. If we would like to set our slider in more detail, nothing stands in the way. Please refer to the plugin documentation and set the appropriate values.

Slider WordPress with own navigation
We move on to the creation of a slider, which will have basic animation when changing slides and navigation. This type of slider is usually used as the first section of the homepage – we can find its use in our project Pierson-Export.
We create a custom post type “slider”
.
We will store our slides in a custom post type : “slider”. We want the slide to contain the image from the display and the slide title. So we will need two fields:
- Featured image,
- Title.
If you don’t know how to create a custom post type – again I refer to the article: Create view (template) for custom post in WordPress.
Widget containing slider – WPBakery, Elementor
If we have already created a custom post type, you should create, as with the first slider type, files for our plugins – depending on the page builder you use, we use the appropriate plugin:
- WPBakery – REDO JSComposer Additional
- Elementor – REDO Elementor Additional
You will find the process of creating the widget in these articles:
- REDO JSComposer Additional – plugin adding widget to WPBakery
- Elementor – how to create your own plugin adding custom post
We move on to creating a widget. In this case, I will do it for WPBakery’s builder page. Setting up the slider for Elementor will be very similar to the slider using owlCarousel, so you can check how to do it by clicking here.
Create a customslider.php file in the render folder and assign it in main.php. Then add the basic widget configuration in the customslider.php file.
1 2 3 4 5 6 7 8 9 10 11 12 13 14 15 16 17 18 19 20 21 22 23 24 25 26 27 28 29 30 31 32 33 34 35 36 37 38 | <?php if ( ! defined( 'ABSPATH' ) ) { die( '-1' ); } class WPBakeryShortCode_customslider extends WPBakeryShortCode { protected function content( $atts, $content = null ) { extract( shortcode_atts( array( '' => '' ), $atts ) ); $slider = get_posts(array( "post_type" => 'slider', 'orderby' => 'date', 'numberposts' => -1, 'order' => 'ASC' )); ob_start(); ?> <!-- HTML DESIGN HERE --> <div class="slider-container"> </div> <!-- HTML END DESIGN HERE --> <?php return ob_get_clean(); } } vc_map( array( "name" => __( 'Custom Slider', 'redo_customslider' ), "base" => "customslider", "category" => __('REDO Addons'), "description" => __('Display custom slider', ''), "icon" => plugin_dir_url( __FILE__ ).'../icons/int-banner.png', 'params' => array( ), ) ); |
The structure of your own WordPress slider
Now we can move on to creating a slider structure. In a previously created div’ie – .slider-container – we create a navigation of our slider which will be displayed in the div’ie – .slider-change. Before displaying the navigation, check that our slider contains enough sliders to create a navigation. The slider must have more slides than 1, so we add a condition:
1 | <?php if(count($slider) !=0 && count($slider) != 1) : "" > |
Then inside the diva .slider-change – we iterate using the foreach, displaying a navigation that will contain links to our slides. Each link must contain an appropriate ID referring to the corresponding slide. So we need to create a $i=0 – it will be responsible for giving the appropriate ID to the navigation elements. We will enlarge it every time we add a navigation element ID. Additionally, the ID will be displayed as a navigation element – increased by 1 navigation code:
1 2 3 4 5 6 7 8 9 10 11 | <?php if(count($slider) !=0 && count($slider) != 1) : ?> <div class="slider-change"> <?php foreach($slider as $slide) : ?> <?php if($i==0) : ?> <a id="<?php echo $i; $i++;?>" class="slider-num slider-active"><?php echo $i; ?></a> <?php else : ?> <a id="<?php echo $i; $i++;?>" class="slider-num"><?php echo $i; ?></a> <?php endif; ?> <?php endforeach ?> </div> <?php endif; ?> |
Now we come to the slide display. We create a foreach, displaying the $slider. You should create a $x = 0 , which will check that the first element in the array gets a slide-active class – .slide-active. This class will make the slide visible, while slides without this class will not be visible on the screen. Images will be displayed as a background slide. The slide title will be included in the h2 header with .slider-header. Slider code:
1 2 3 4 5 6 7 8 9 10 11 12 13 14 15 | <?php foreach($slider as $slide) : ?> <?php if($x==0) : ?> <div class="slider slide-active " style="background: url(<?php echo get_the_post_thumbnail_url($slide->ID, 'full'); ?>);"> <div class="slider-content"> <h2 class="slider-header"><?php echo $slide->post_title; $x++; ?></h2> </div> </div> <?php else : ?> <div class="slider" style="background: url(<?php echo get_the_post_thumbnail_url($slide->ID, 'full'); ?>);"> <div class="slider-content"> <h2 class="slider-header"><?php echo $slide->post_title; ?></h2> </div> </div> <?php endif; ?> <?php endforeach ?> |
The whole PHP code including counters:
1 2 3 4 5 6 7 8 9 10 11 12 13 14 15 16 17 18 19 20 21 22 23 24 25 26 27 28 29 30 31 32 33 34 35 36 37 38 39 40 41 42 43 44 45 46 47 48 49 50 51 52 53 54 55 56 57 58 59 60 61 62 63 64 65 66 67 68 69 70 | <?php if ( ! defined( 'ABSPATH' ) ) { die( '-1' ); } class WPBakeryShortCode_customslider extends WPBakeryShortCode { protected function content( $atts, $content = null ) { extract( shortcode_atts( array( '' => '' ), $atts ) ); $slider = get_posts(array( "post_type" => 'slider', 'orderby' => 'date', 'numberposts' => -1, 'order' => 'ASC' )); $i = 0; $x = 0; ob_start(); ?> <!-- HTML DESIGN HERE --> <div class="slider-container"> <?php if(count($slider) !=0 && count($slider) != 1) : ?> <div class="slider-change"> <?php foreach($slider as $slide) : ?> <?php if($i==0) : ?> <a id="<?php echo $i; $i++;?>" class="slider-num slider-active"><?php echo $i; ?></a> <?php else : ?> <a id="<?php echo $i; $i++;?>" class="slider-num"><?php echo $i; ?></a> <?php endif; ?> <?php endforeach ?> </div> <?php endif; ?> <?php foreach($slider as $slide) : ?> <?php if($x==0) : ?> <div class="slider slide-active " style="background: url(<?php echo get_the_post_thumbnail_url($slide->ID, 'full'); ?>);"> <div class="slider-content"> <h2 class="slider-header"><?php echo $slide->post_title; $x++; ?></h2> </div> </div> <?php else : ?> <div class="slider" style="background: url(<?php echo get_the_post_thumbnail_url($slide->ID, 'full'); ?>);"> <div class="slider-content"> <h2 class="slider-header"><?php echo $slide->post_title; ?></h2> </div> </div> <?php endif; ?> <?php endforeach ?> </div> <!-- HTML END DESIGN HERE --> <?php return ob_get_clean(); } } vc_map( array( "name" => __( 'Custom Slider', 'redo_customslider' ), "base" => "customslider", "category" => __('REDO Addons'), "description" => __('Display custom slider', ''), "icon" => plugin_dir_url( __FILE__ ).'../icons/int-banner.png', 'params' => array( ), ) ); |
Javascript supporting slider navigation
We move on to the creation of a slider script that will handle navigation between the slides. Before that, we need to create a few sample slides with titles and images – in our case it will be three slides.
We will use pure javascript to create the script, because these are very simple instructions that do not require jQuery.
We create two tables:
- Slider Hygiene Links – myBtns[]
- Slide table – sliders[]
With querySelectorAll we download our elements:
1 2 | let myBtns = document.querySelectorAll('.slider-num'); let sliders = document.querySelectorAll('.slider'); |
Now in a loop for each element myBtns[] we add EventListener “click”, checking if we have clicked a link to the slide. If you clicked, check with getElementsByClassName the active navigation link and active slide.
1 2 3 4 5 6 | for (var i = 0; i < myBtns.length; i++) { myBtns[i].addEventListener("click", function() { var current = document.getElementsByClassName("slider-active"); var currentSlide = document.getElementsByClassName("slide-active"); }); } |
Now delete the active classes and assign them to the corresponding link in the navigation and the corresponding slide. This way you get the whole JS script:
1 2 3 4 5 6 7 8 9 10 11 12 13 14 15 16 | <script> let myBtns = document.querySelectorAll('.slider-num'); let sliders = document.querySelectorAll('.slider'); for (var i = 0; i < myBtns.length; i++) { myBtns[i].addEventListener("click", function() { var current = document.getElementsByClassName("slider-active"); var currentSlide = document.getElementsByClassName("slide-active"); current[0].className = current[0].className.replace("slider-active", ""); currentSlide[0].className = currentSlide[0].className.replace("slide-active", ""); this.className += " slider-active"; sliders[this.id].className += " slide-active"; }); } </script> |
CSS code of our slider
That is it. We have our slider with navigation support working. Now you can move on to styling and adding value to our classes.
The first thing to do is to style our slider, it must have position: relative to properly store our slides, which will have position: absolute and will be displayed on full-width. Accordingly to the slide you need to set background:cover to cover the entire diva surface. By default .slider will have visibility: hidden, only after receiving a class .slide-active with animation fadeIn visibility will change to visible.
We can stylize the navigation in any way we want, just as we can change the way it is displayed in PHP code. Below we add our CSS slider style, which also includes a slide animation.
1 2 3 4 5 6 7 8 9 10 11 12 13 14 15 16 17 18 19 20 21 22 23 24 25 26 27 28 29 30 31 32 33 34 35 36 37 38 39 40 41 42 43 44 45 46 47 48 49 50 51 52 53 54 55 56 57 58 59 60 61 62 63 64 65 66 67 68 69 70 71 72 73 74 75 76 77 78 79 80 81 82 83 84 85 86 87 88 89 90 91 92 93 94 95 96 97 98 99 100 101 102 103 104 105 106 107 108 109 110 111 112 113 114 115 116 117 118 119 120 121 122 123 124 125 126 127 128 129 130 131 132 133 134 135 136 | /* Slider */ .slider-container { position: relative; margin-top: -30px; top: 0 !important; height: 900px; display: flex; overflow-y: hidden; background-color: #000; } .slider { position: absolute; visibility: hidden; height: 900px; width: 100%; background-position: center !important; background-repeat: no-repeat !important; background-size: cover !important; display: flex; align-items: center; } @keyframes fadeIn { 0% { opacity: 0; } 100% { visibility: visible; opacity: 1; } } .slide-active { animation: 2s fadeIn; animation-fill-mode: forwards; } @-webkit-keyframes slide-in-top { 0% { -webkit-transform: translateY(-1000px); transform: translateY(-1000px); opacity: 0; } 100% { -webkit-transform: translateY(0); transform: translateY(0); opacity: 1; } } @keyframes slide-in-top { 0% { -webkit-transform: translateY(-1000px); transform: translateY(-1000px); opacity: 0; } 100% { -webkit-transform: translateY(0); transform: translateY(0); opacity: 1; } } .slider-content { display: flex; flex-direction: column; justify-content: center; margin-left: 255px; max-width: 950px; margin-top: 180px; } .slider-header { margin: 0px; color: #fff; } .slider-change { height: 180px; width: 60px; position: absolute; right: 255px !important; top: 400px; display: flex; flex-direction: column; text-align: right; } .slider-num { position: absolute; color: #ffffff; margin: 0 0 33px 0; cursor: pointer; display: block !important; z-index: 3; margin-left:30px; font-family: Lato; font-size: 24px; font-weight: bold; font-stretch: normal; font-style: normal; line-height: normal; letter-spacing: normal; text-align: right; color: rgba(255, 255, 255, 0.3); } .slider-num:nth-child(2){ margin-top: 60px; } .slider-num:nth-child(3){ margin-top: 120px; } .slider-num:after { content: ''; position: absolute; width: 20px; height: 20px; opacity: 0.3; background-color: #ffffff; margin-left: 12px; margin-top: 5px; } .slider-active:after { content: ''; position: absolute; width: 20px; height: 20px; background-color: #ffffff; margin-left: 17px; opacity: 1; margin-top: 15px; } .slider-active { font-family: Lato; font-size: 38px; font-weight: bold; color: #ffffff !important; margin-left: 15px; } .slider-active a { color: #ffffff !important; } /* End Slider */ |
We have maintained a working WordPress slider
In this way, we have a slider with a simple JS and CSS code, which we can freely change in terms of both structure and appearance.
Summary
In this article we have presented how to create a slider in WordPress displaying custom post type in two ways. We learned the basic configuration of the owlCarousel plugin, which is a very versatile tool to create different types of sliders. The plugin is lightweight, responsive and what’s important – it doesn’t burden our website. The second way is to create a simple slider with basic navigation, own JS script and simple CSS code.
Both ways require some improvements, but by using them we can fully customise the slider the way we need it. Using ready-made solutions, we often have to make some concessions and we cannot apply certain features.
If you want to learn more about creating widgets for Elementor or WPBakery and more – read our other articles – https://redo-interactive.com/en/useful-articles/.