Creating your own plugin that adds a widget to the Elementor plugin
In previous tutorials we created REDO JSComposer Additional plugin adding widgets to WPBakery plugin. We would like to create a similar solution to another page builder – Elementor. In this article you will learn how to do it.
Elementor is customized for creating your own widgets and has a much more pleasant development environment for adding your own extensions. There are also a lot of tutorials on how to create your own plugin creating new functionalities for the elementor plugin. In this article we’ll follow the tutorial under this link: https://www.youtube.com/watch?v=Ko9i153o_iU&t=454s, here you will find the source code of this tutorial: https://github.com/alexander-young/custom-elementor-widget/.
Besides, when creating the plugin, we will follow the previously created REDO JSComposer Additional plugin, its structure and functionality. Description of this plugin and the process of its creation can be found in previous articles: Creating your own plugin that adds a widget to the WPBakery plugin and REDO JSComposer Additional – plugin adding widget to WPBakery.
Let’s start! Creating your own plugin that adds a widget to the Elementor plugin
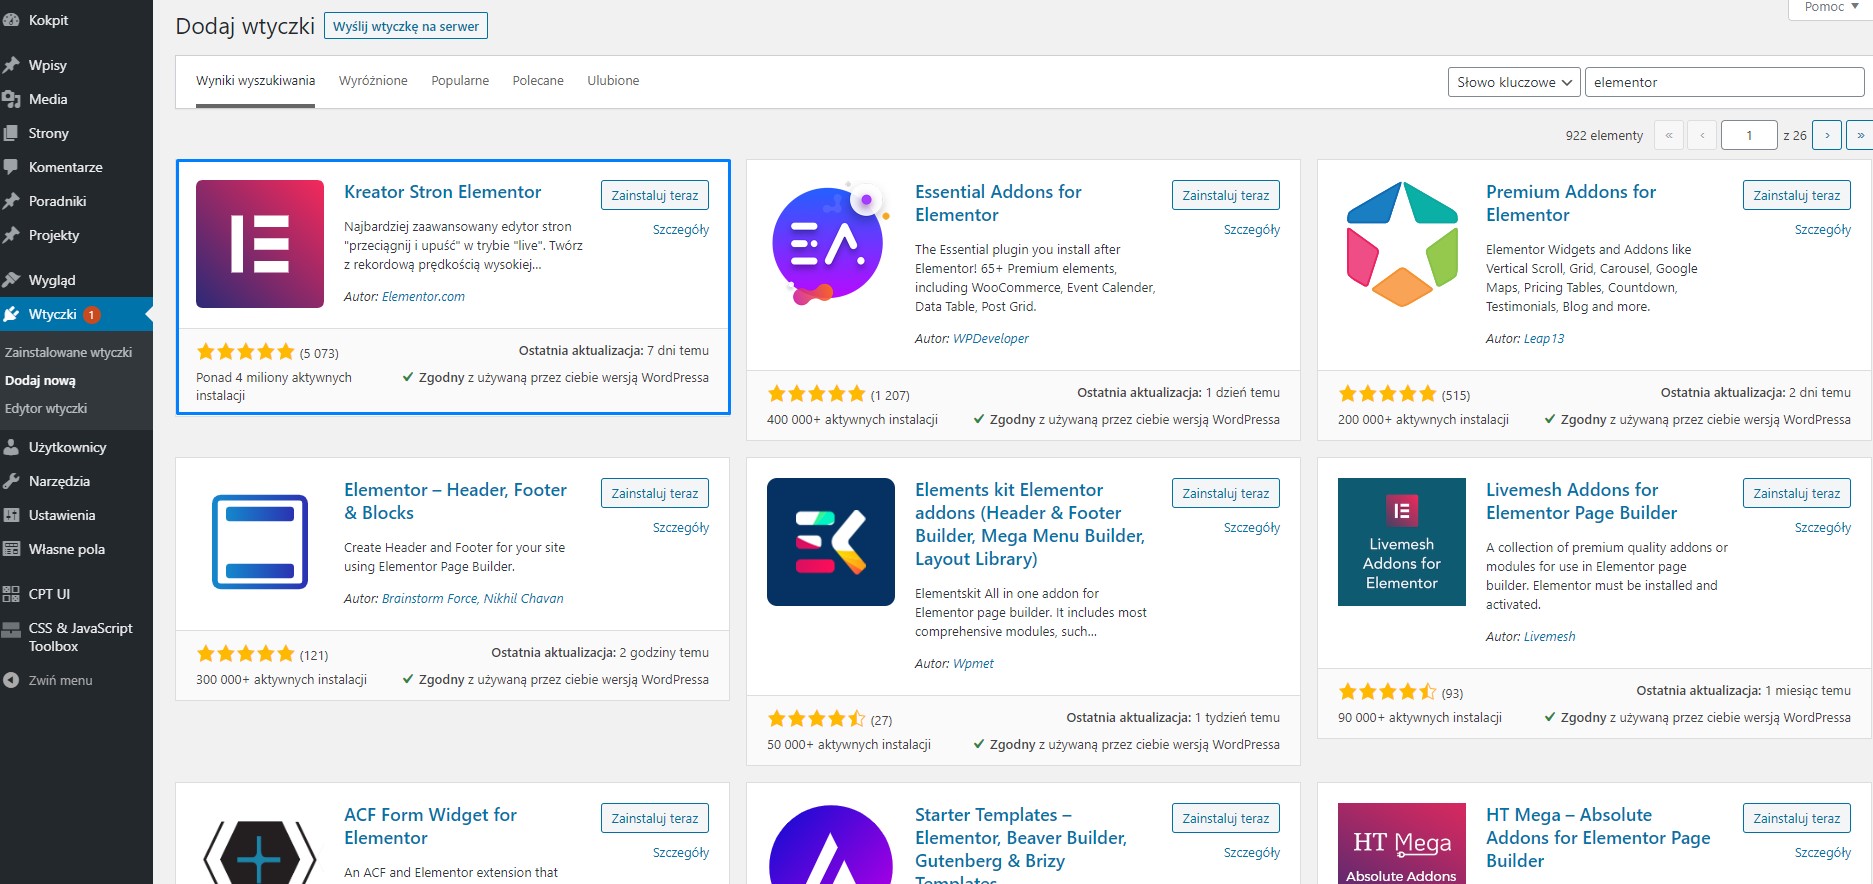
We are installing a free version of the Elementor plugin, which you will find there and in the WordPress plugin collection.
Besides, we will need the ACF and CPT UI plugins, which were presented in earlier articles: Create a view (template) for a custom post in WordPress and Advanced Custom Fields – custom field types WordPress. We will use them to display views through widgets, which will contain custom types and custom fields. If you’re going to use a plugin to create views not based on these plugins you don’t have to install them (include in the change code if you’re not going to use these plugins).
If we already have Elementor installed, we create a folder with our plugin. We do the same as when creating the REDO JSComposer Additional plugin. We start by creating a folder in plugins of our WordPress. The folder is named after the new plugin: REDO Elementor Additional – the folder will be named – redo-elementor-additional.
The structure of the folder will be similar to the previous plugin:
- index.php – will contain information about our plugin and will refer to the main.php file and initialize the E_REDO class – responsible for handling our plugin,
- main.php – a file that supports our plugin and contains a reference to the folder with our widgets,
- /widgets/ – a folder containing files with our widgets, in this tutorial we will show how to create a widget displaying posts of project – the file with the widget will be called projekt.php.

Go to index.php file. We call our plugin, add description, URL, author, similar to the WPBaker plugin.
Elementor requires namespace to work properly namescape, which prevents class names from being duplicated – more about namespaces can be found here: https://www.phpdevs.pl/programowanie-obiektowe/9-przestrzenie-nazw. We call our namescape – REDO. Then we proceed to create a loop to check if it is defined ABSPATH.
Using require_once() we assign our main.php file. Then create the $redo_object containing class initiation E_REDO from main file. php.
1 2 3 4 5 6 7 8 9 10 11 12 13 14 15 16 | <?php /** * Plugin Name: REDO Elementor Additional * Description: Custom element added to Elementor * Plugin URI: https://redo-interactive.com/ * Version: 0.0.1 * Author: REDO * Author URI: https://redo-interactive.com/ * Text Domain: redo-elementor-additional */ namespace REDO; if ( ! defined( 'ABSPATH' ) ) { die( '-1' ); } require_once('main.php'); $redo_object = new E_REDO(); |
Now we will edit the main.php file. We give the same name namespace and again check ABSPATH.
1 2 3 | <?php namespace REDO; if (!defined('ABSPATH')) exit; |
We create a class E_REDO – it will contain the logic of our plugin.
1 | class E_REDO { } |
In the classroom, create a class constructor using the __construct() function. In the constructor, similarly to the REDO JSComposer Additional, we include hook’i.
- add_action(‘init’, [$this, ‘check_for_install’]) – when initiating our plugin, we add checking if there are any plugins installed that are needed for proper operation of our plugin, that is: ACF, CPT UI, Elementor,
- add_action(‘elementor/widgets/widgets_registered’, [$this, ‘register_widgets’])– here we register our widget using the register_widgets().
We create the include_widgets_files() adding a file with our projekty.php widget.
1 2 3 4 | private function include_widgets_files() { require_once(__DIR__ . '/widgets/projekty.php'); } |
Add the function register_widgets() registering our widget to Elementor. It also contains the include_widgets_files() function that attaches our files from the /widgets/ folder. Let’s not forget to add ‘\’, which defines paths to classes.
1 2 3 4 5 | public function register_widgets() { $this->include_widgets_files(); \Elementor\Plugin::instance()->widgets_manager->register_widget_type(new Widgets\Projekty()); } |
We then define our check_for_install(). This is analogous to the check_for_install() in the REDO JSComposer Additional plugin.
1 2 3 4 5 6 7 8 9 10 11 12 13 14 15 16 17 18 19 20 21 22 23 24 25 26 27 28 29 30 31 32 33 34 35 36 37 38 | public function check_for_install() { E_REDO::show_redo_warning(); return; } private function show_redo_warning() { if (!defined('ELEMENTOR_VERSION')) { $link = "https://pl.wordpress.org/plugins/elementor/"; $plugin = "Elementor Page Builder"; ?> <div class="notice notice-warning is-dismissible"> <p>Please install <a href="<?php echo $link; ?>"><?php echo $plugin; ?></a> to use REDO JSComposer Additional.</p> </div> <?php } if (!defined('CPT_VERSION')) { $link = "https://pl.wordpress.org/plugins/custom-post-type-ui/"; $plugin = "Custom Post Type UI"; ?> <div class="notice notice-warning is-dismissible"> <p>Please install <a href="<?php echo $link; ?>"><?php echo $plugin; ?></a> to use REDO JSComposer Additional.</p> </div> <?php } if (!defined('ACF_VERSION')) { $link = "https://pl.wordpress.org/plugins/advanced-custom-fields/"; $plugin = "Advanced Custom Fields"; ?> <div class="notice notice-warning is-dismissible"> <p>Please install <a href="<?php echo $link; ?>"><?php echo $plugin; ?></a> to use REDO JSComposer Additional.</p> </div> <?php } } |
The whole code of our file main.php:
1 2 3 4 5 6 7 8 9 10 11 12 13 14 15 16 17 18 19 20 21 22 23 24 25 26 27 28 29 30 31 32 33 34 35 36 37 38 39 40 41 42 43 44 45 46 47 48 49 50 51 52 53 54 55 56 57 58 | <?php namespace REDO; if (!defined('ABSPATH')) exit; class E_REDO { public function __construct() { add_action('init', [$this, 'check_for_install']); add_action('elementor/widgets/widgets_registered', [$this, 'register_widgets']); } private function include_widgets_files() { require_once(__DIR__ . '/widgets/projekty.php'); } public function register_widgets() { $this->include_widgets_files(); \Elementor\Plugin::instance()->widgets_manager->register_widget_type(new Widgets\Projekty()); } public function check_for_install() { E_REDO::show_redo_warning(); return; } private function show_redo_warning() { if (!defined('ELEMENTOR_VERSION')) { $link = "https://pl.wordpress.org/plugins/elementor/"; $plugin = "Elementor Page Builder"; ?> <div class="notice notice-warning is-dismissible"> <p>Please install <a href="<?php echo $link; ?>"><?php echo $plugin; ?></a> to use REDO JSComposer Additional.</p> </div> <?php } if (!defined('CPT_VERSION')) { $link = "https://pl.wordpress.org/plugins/custom-post-type-ui/"; $plugin = "Custom Post Type UI"; ?> <div class="notice notice-warning is-dismissible"> <p>Please install <a href="<?php echo $link; ?>"><?php echo $plugin; ?></a> to use REDO JSComposer Additional.</p> </div> <?php } if (!defined('ACF_VERSION')) { $link = "https://pl.wordpress.org/plugins/advanced-custom-fields/"; $plugin = "Advanced Custom Fields"; ?> <div class="notice notice-warning is-dismissible"> <p>Please install <a href="<?php echo $link; ?>"><?php echo $plugin; ?></a> to use REDO JSComposer Additional.</p> </div> <?php } } } |
We are going to edit our widget – projekty.php.
The first step is to namepace the namespace and add the elementary classes on which we will be based. We also check ABSPATH.
1 2 3 4 5 | <?php namespace REDO\Widgets; use Elementor\Widget_Base; use Elementor\Controls_Manager; if ( ! defined( 'ABSPATH' ) ) exit; |
We create our class Design inheriting by means of extensions after class Widget_Base.
1 | class Projekty extends Widget_Base { } |
We set our widget accordingly using the built-in elementor function:
- get_name() – in this section we name our widget (slug),
- get_title() – we give the Label to our widget, it will be visible in the Elementor panel,
- get_icon() – here we set the icon of our widget – in our case it will be an eye like the WPBaker plugin. Here we can use the icons available in FontAwesome, because Elementor is compatible with FontAwesome by default.
- get_categories() – set the category in which our widget will be displayed, select ‘general’,
- _register_controls() – here we give options to customize our widget, as our goal is only to display projects – we only add a label indicating what the widget is responsible for.
1 2 3 4 5 6 7 8 9 10 11 12 13 | public function get_name() { return 'projekty'; } public function get_title() { return __( 'Projekty' ); } public function get_icon() { return 'fa fa-eye'; } public function get_categories(){ return ['general']; } protected function _register_controls() {} |
Inside_register_controls() we use functions:
- start_controls_section() – gives a section name with widget personalization,
- add_control() – adds our personalization settings,
- end_controls_section() – closes the section.
1 2 3 4 5 6 7 8 9 10 11 12 13 14 15 16 17 | protected function _register_controls() { $this->start_controls_section( 'section_content', [ 'label' => 'Settings', ] ); $this->add_control( 'projekty', [ 'label' => 'Projekty', 'type' => \Elementor\Controls_Manager::HEADING, 'default' => 'Display projects' ] ); $this->end_controls_section(); } |
Then we only use render() to display our project view.
1 2 3 4 5 6 7 8 9 10 11 12 13 14 15 16 17 18 19 20 21 22 23 24 25 | protected function render(){ $args = array( 'post_type' => 'projekt', 'posts_per_page' => -1, 'orderby' => 'date' ); $projekty = new \WP_Query($args); ?> <!-- HTML DESIGN HERE --> <div class="projekty-container"> <h2 class="projekty-container-tytul">PROJEKTY</h2> <?php while ($projekty->have_posts()) : $projekty->the_post(); ?> <div class="projekt"> <h1 class="projekt-tytul"> <a href="<?php echo get_permalink(); ?>"> <?php echo get_the_title() ?> </a> </h1> <?php echo get_the_post_thumbnail(get_the_ID(), 'medium'); ?> </div> <?php endwhile; ?> </div> <!-- HTML END DESIGN HERE --> <?php } |
The whole code of our widget:
1 2 3 4 5 6 7 8 9 10 11 12 13 14 15 16 17 18 19 20 21 22 23 24 25 26 27 28 29 30 31 32 33 34 35 36 37 38 39 40 41 42 43 44 45 46 47 48 49 50 51 52 53 54 55 56 57 58 59 60 61 | <?php namespace REDO\Widgets; use Elementor\Widget_Base; use Elementor\Controls_Manager; if ( ! defined( 'ABSPATH' ) ) exit; class Projekty extends Widget_Base { public function get_name() { return 'projekty'; } public function get_title() { return __( 'Projekty' ); } public function get_icon() { return 'fa fa-eye'; } public function get_categories(){ return ['general']; } protected function _register_controls() { $this->start_controls_section( 'section_content', [ 'label' => 'Settings', ] ); $this->add_control( 'projekty', [ 'label' => 'Projekty', 'type' => \Elementor\Controls_Manager::HEADING, 'default' => 'Display projects' ] ); $this->end_controls_section(); } protected function render(){ $args = array( 'post_type' => 'projekt', 'posts_per_page' => -1, 'orderby' => 'date' ); $projekty = new \WP_Query($args); ?> <!-- HTML DESIGN HERE --> <div class="projekty-container"> <h2 class="projekty-container-tytul">PROJEKTY</h2> <?php while ($projekty->have_posts()) : $projekty->the_post(); ?> <div class="projekt"> <h1 class="projekt-tytul"> <a href="<?php echo get_permalink(); ?>"> <?php echo get_the_title() ?> </a> </h1> <?php echo get_the_post_thumbnail(get_the_ID(), 'medium'); ?> </div> <?php endwhile; ?> </div> <!-- HTML END DESIGN HERE --> <?php } } |
It’s done! We got a working plugin to add our own widgets in the Elementor plugin.

Summary
Creating plugins compatible with other plugins such as WPBakery or Elementor requires knowledge of the environment of the given plugin. Fortunately, plug-ins usually have good documentation from which we can learn about the environment. In the case of Elementor, it is important not to forget about namespaces and prefixes of ‘\’ classes. Elementor is adapted to add custom widgets and has a lot of facilities for developers. Check the documentation: https://docs.elementor.com/