Advanced Custom Fields – custom field types WordPress
Thanks to custom field types, we can add properties, images and any other content to our own post type that would determine additional functionality of our entry. In this tutorial you will learn how to add such fields to a given type of posts.
How do I add custom field types for Custom Post Type using Advanced Custom Fields in WordPress?
What do we need?
- Advanced Custom Fields Plugin – a plugin that allows you to add your own field types,

- Knowledge from previous tutorial – Creating a template for custom post – if you don’t know how to create a Custom Post Type using CPT UI I’m sending you back to this tutorial,
- Basic language knowledge PHP – no complicated functions will be used here, but you will need to familiarize yourself with the basic language syntax to be able to understand the code that will be in this guide.
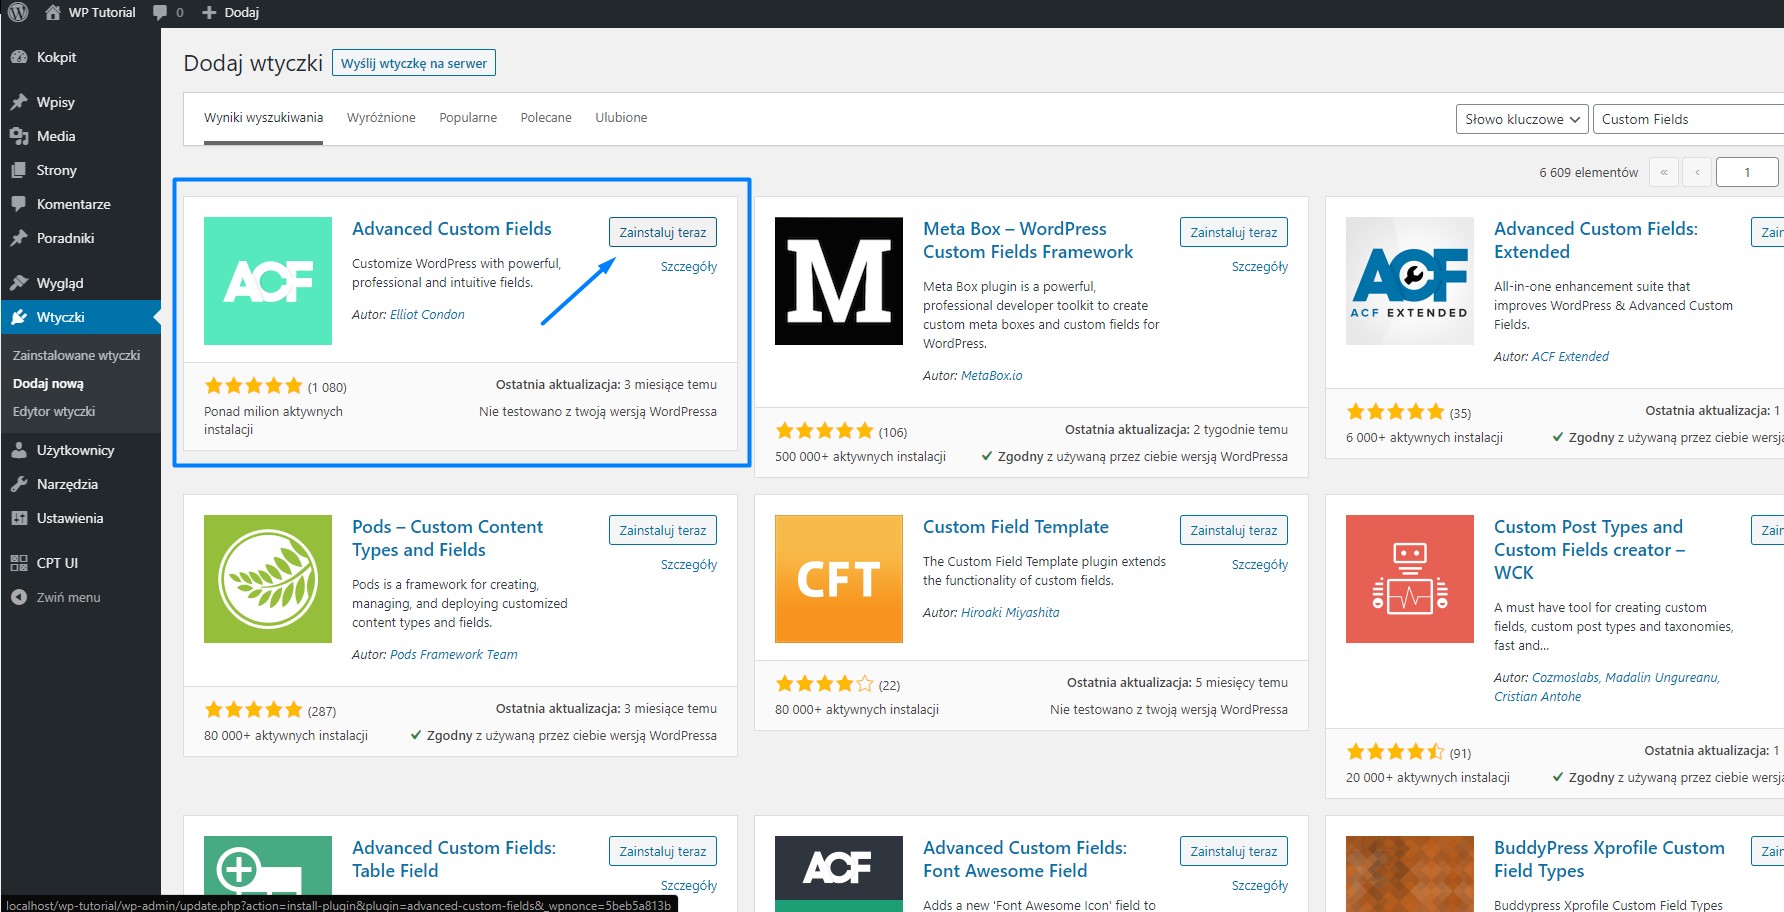
Let’s do it! Creating custom fields with advanced custom fields in WordPress
After installing ACF (Advanced Custom Fields) plugin we move on to create a new post type – Projekt. We will want to create a list of projects in the form of a portfolio, which will contain several basic fields:
- Title,
- Brief project description,
- Description of the project,
- The year of the project,
- What we did in the project,
- The distinguishing image,
- The images of the project
Go to CPT UI and add a new type of post (if you don’t know how to do it I refer to the previous tutorials):
- Slug -> projekt,
- Plural -> Projekty,
- Singular -> Projekt
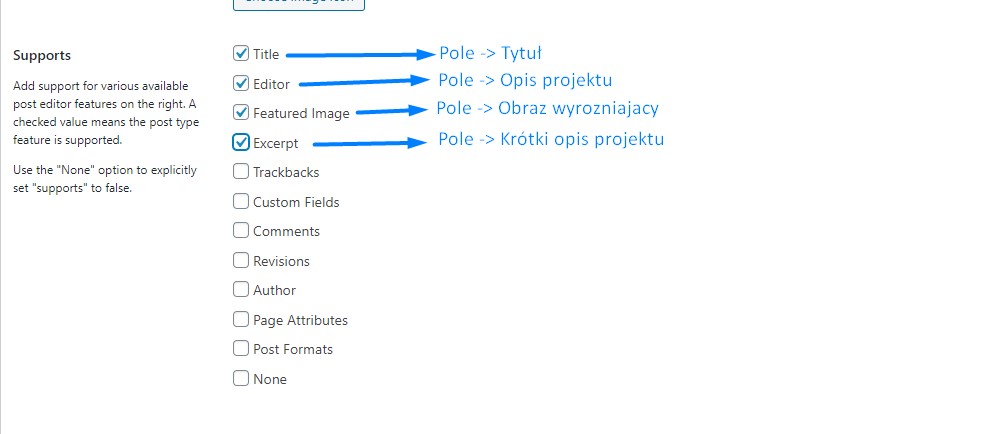
Let’s use the built-in CPT UI option to create some basic fields for our custom post.
After creating Custom Post Type -> Projekt and adding the basic fields we proceed to add the remaining fields using Custom Fields. Go to the tab in the WordPress panel: Friendly fields -> Add new. Please give a title to a group of fields. Here I suggest that the naming should not get mixed up in the further part of creating the project to name from the single number of our Custom Post to which we want to add the field data and add a name Inputs so that you know that it is about your own field types. In our case it will be: Projekt Inputs.
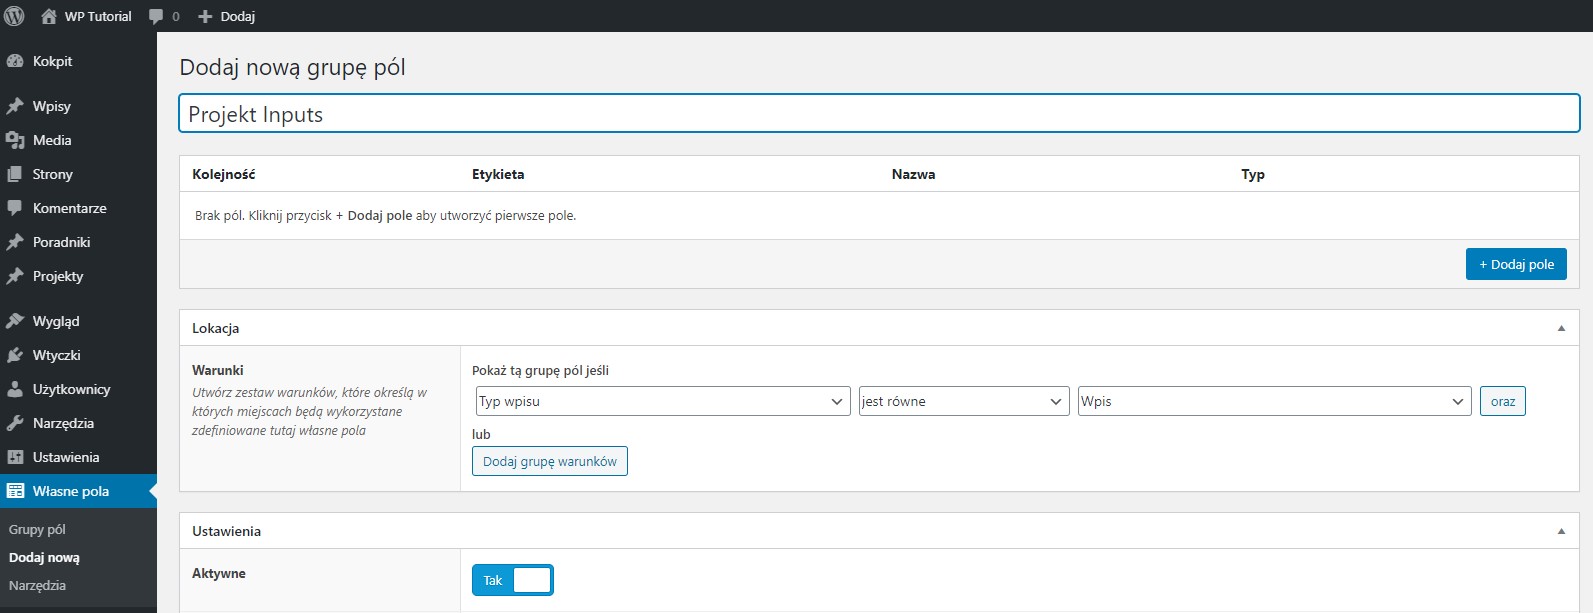
Click the add field button and select the desired field type and name it.
Field text -> the name displaying the field, there may be Polish characters and spaces – will be visible only in the WordPress panel. Give this label so you know what the field is responsible for, e.g. ”What we did in the project”.
Field name -> Like the service for posting, it cannot contain Polish characters and will be used in PHP code. Give an easy field name, e.g. “wykonanie”..
Field type -> field types are different, they are described in plugin documentation. In our case it will be for example Text.
The rest of the -> fields; they are optional and we can use them to customize the field input for our project, but in our case this will not be necessary. For more information, see documentation.
Remember to add Condition for a given group of fields after creating all field types:
The type of entry -> it is equal to -> Projekt (Custom Post Type, with us type: Projekt).

Ready! We added our own field types for our own post type. Now we can move on to adding some sample projects.
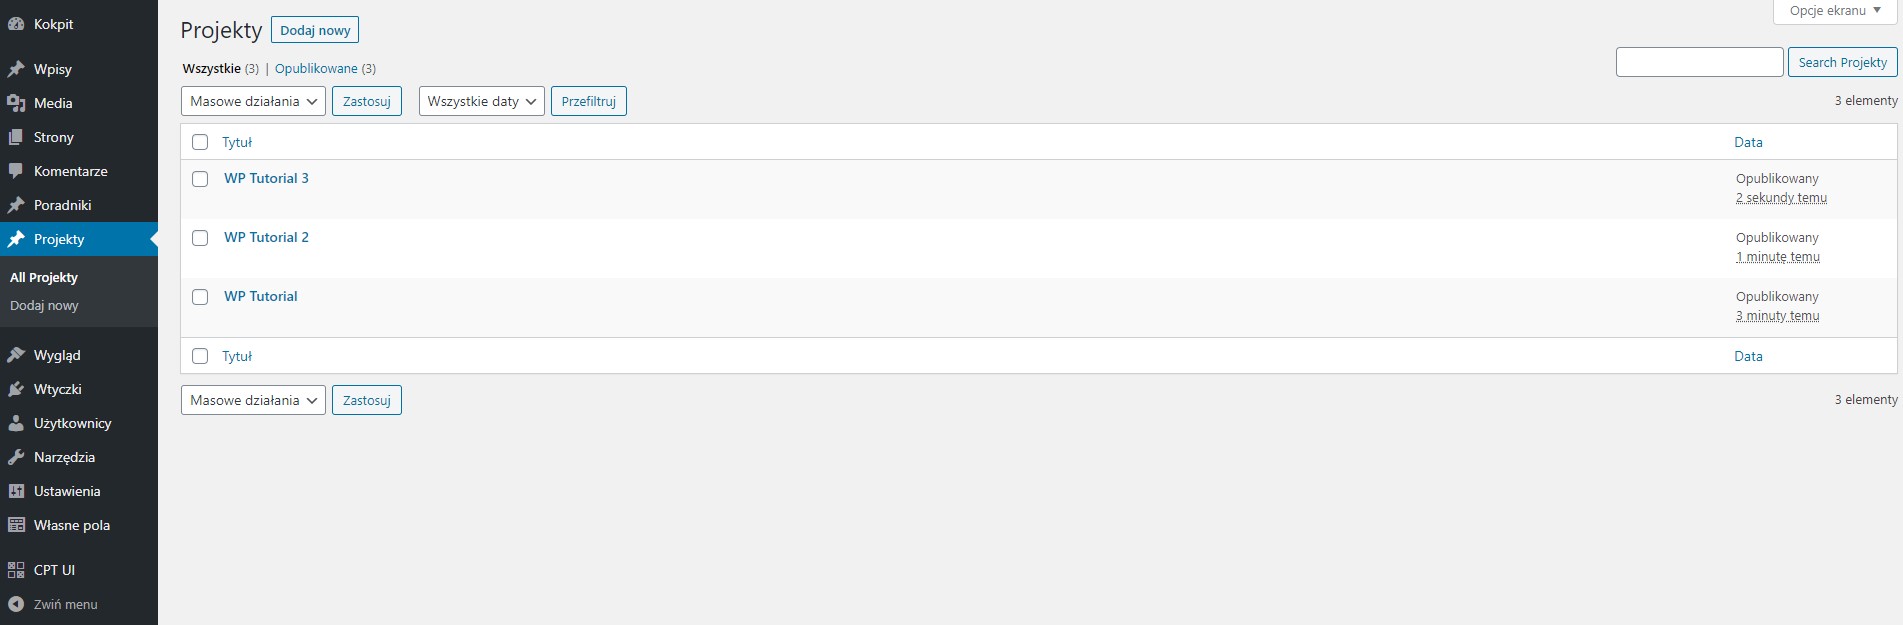
We added some sample preview projects. Now go to the backend page and try to create a view for a single project, displaying all fields.
We are working on an empty wp_tutorial theme, created for the tutorial. If you don’t know how to create your own theme I refer to tutorial. Copy the single.php file and add the name of our custom post type slug to it, creating a single-projekt.php file.
We’re starting to edit our code:
1 2 3 4 5 6 7 8 9 10 11 12 13 14 15 16 17 18 19 20 21 22 23 24 25 26 27 28 29 30 31 32 33 34 35 36 37 38 39 40 41 42 43 44 45 46 47 48 49 50 51 52 53 54 55 56 57 | <?php /** * The template for displaying all single posts * * @link https://developer.wordpress.org/themes/basics/template-hierarchy/#single-post * * @package wp_tutorial */ get_header(); ?> <div id="primary" class="content-area"> <main id="main" class="site-main"> <?php while ( have_posts() ) : the_post(); ?> <h2 class="tytul-projektu"><?php the_title();?></h2> <h5 class="krotki-opis-projektu"><?php the_excerpt();?></h5> <span class="wykonanie"><?php the_field('wykonanie') ?></span> <span class="rok"><?php the_field('rok') ?></span> <div class="obraz-glowny"><?php the_post_thumbnail( 'full' ); ?></div> <div class="opis-projektu"><?php the_content(); ?></div> <div class="obrazy"> <?php $image1 = get_field('obraz_1'); $image2 = get_field('obraz_2'); if( $image1 ): ?> <?php $title = $image1['title']; $alt = $image1['alt']; $size = 'large'; $thumb = $image1['sizes'][ $size ]; ?> <a title="<?php echo esc_attr($title); ?>"> <img src="<?php echo esc_url($thumb); ?>" alt="<?php echo esc_attr($alt); ?>" /> </a> <?php endif; if( $image2 ): ?> <?php $title = $image2['title']; $alt = $image2['alt']; $size = 'large'; $thumb = $image2['sizes'][ $size ]; ?> <a title="<?php echo esc_attr($title); ?>"> <img src="<?php echo esc_url($thumb); ?>" alt="<?php echo esc_attr($alt); ?>" /> </a> <?php endif; ?> </div> <?php // End of the loop. endwhile; ?> </main><!-- #main --> </div><!-- #primary --> <?php get_footer(); |
This way we displayed all custom post fields of the projekt type. The main method for displaying field values is the_field(‘name_field’). We used it to display fields: wykonanie, rok.
1 2 | <span class="wykonanie"><?php the_field('wykonanie') ?></span> <span class="rok"><?php the_field('rok') ?></span> |
We also used get_field(‘name_field’) to download images. Images downloaded using custom field’s can be downloaded using an array or url. By default, an array is returned, on which we later operate to retrieve the title of the image and alternative text, and set the appropriate size of the image.
1 2 | $image1 = get_field('obraz_1'); $image2 = get_field('obraz_2'); |
- in the value of $title we keep the title of the painting,
- $alt keeps the alternative text,
- $size determines image size,
- $thumb is responsible for downloading the image address in the appropriate size.
1 2 3 4 | $title = $image1['title']; $alt = $image1['alt']; $size = 'large'; $thumb = $image1['sizes'][ $size ]; |
Methods esc_attr() and esc_url() allow for proper display of attributes and url.
1 2 3 | <a title="<?php echo esc_attr($title); ?>"> <img src="<?php echo esc_url($thumb); ?>" alt="<?php echo esc_attr($alt); ?>" /> </a> |
We have received a view with all added fields. In this way we can display any added content using CPT UI and ACF.

Summary
Adding custom post type with its own field types is an advanced application of WordPress, thanks to which we can add many modules, views and features that are not present in the basic version of WordPress. Using our example is quite a simple solution, but you need to know basic PHP and HTML syntax. Additionally, there are built-in WordPress and ACF functions. The biggest difficulty in this example is downloading images and displaying them. When you learn the function from the example above, you can easily display your own field types in views.