How to add google maps iframe with multiple locations in WordPress
In this article we will show you how to quickly and easily add a Google Maps iframe with multiple locations to your WordPress website. This will be a very easy and short task, but if you’ve never done this, this article is definitely for you.
We create an iframe with google maps
We will place our map using the WPBakery plugin and the map itself will be in the <iframe/>. You can place this tag anywhere on the page using any tool and not necessarily in WordPress. In this tutorial I’ll show you how to create a structure to place a map through WPBakers and then the map creation process itself.
We prepare the structure to add a google map
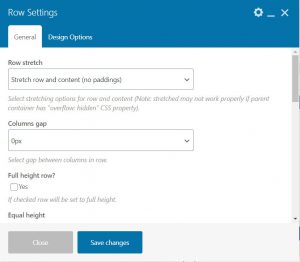
The first step is to create a container that will hold our map. We want the map to be full screen width, so we add Row with Stretch row and content (no paddings) properties.
Now we add a map to the created container using the built-in Google Maps widget.
If we already have a basic google map added, we move on to its configuration.
Iframe with a map which has now been added by WPBakery plugin contains a random location and one tag. Our goal is to create a map for full screen resolution that will contain several location markers selected by us.
We set in Map embed iframe width=”100%”, to maximize the map width, then inHigh we set how high our map is to be in our case it will be 600px.
1 2 3 4 5 6 7 8 | <iframe src="https://www.google.com/maps/d/u/0/embed?mid=1QTmn9yOG2tXlLBUP74v3efnE6Sansk5D" width="100%" height="450" frameborder="0" style="border:0" allowfullscreen> </iframe> |
Now we can move on to making our own map.
Create a map with multiple location points using Google Maps Map Maker
Firstly, we need to be logged into our Google account. Then we go to the link: https://www.google.com/maps/about/mymaps/
Click the “Try” button and create a new map.
Enter the desired location where we want to add the tag – in our case it will be Poznań.
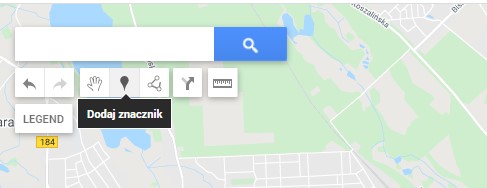
Then click on the marker icon and add the marker.
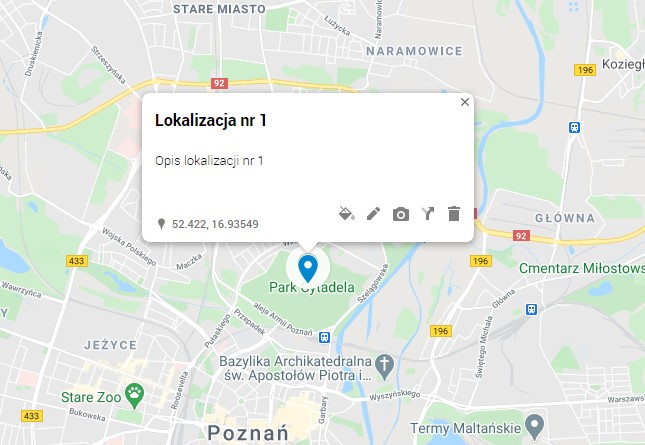
We add another marker with the same option. Then we go to “Put on my page” and copy the code included in it.
Paste in our iframe generated by Google, remembering to keep the iframe’s previous width and height.
We get the following view on the page:
We can of course freely influence the map displayed on the page. We can create a route between locations, change their name and description, and we can change the map image and colours of the pins.
Summary
Adding an iframe from Google Maps to a website is a trivial thing and very often used on websites. However, not everyone knows that we can create such maps using Google Maps Maker, which gives us more options than the basic tool for sharing Google Maps.
I invite you to visit the list of our articles, where you will learn a lot more about WordPress and more: Useful articles.


